

Quick Start Guide
This Firmware User Manual covers Ouster sensor firmware features: lidar operation, data formats, API reference, and troubleshooting.
For mechanical and electrical details, or interface box documentation, see the Hardware User Manual.
For sensor specifications, see the datasheets on the Ouster Website.
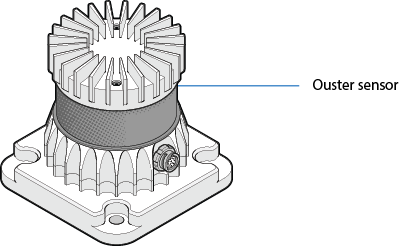
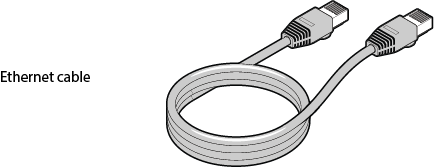
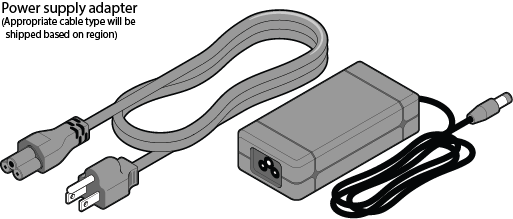
What’s in the box
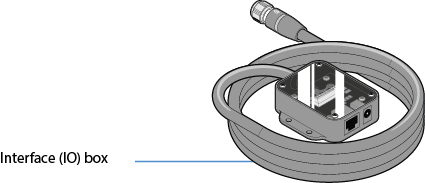
Note: Interface box is not always shipped with the sensor, based on customer requirement it could be a pig tail connector cable or a custom cable.
Sensor Setup
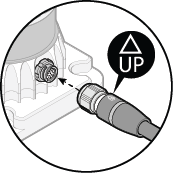
- Connect one end of the bayonet-style connector to the Ouster sensor as shown. Verify that the plug “UP” indicator is pointed up.
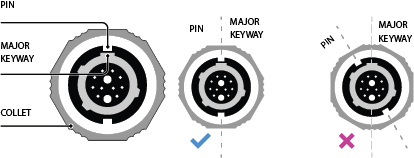
- Rotate the collet on the plug until one of its two pins is aligned with the major keyway. This will allow its two pins to enter the receptacle channel.
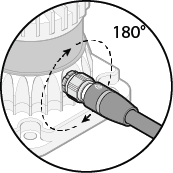
- Connect the plug to the sensor, then rotate the collet 180° clockwise until it clicks—fully seated. Verify the red line on the stainless steel collet aligns with the emblem on the overmold. This confirms the connector is locked.
-
Connect one end of the power supply to the wall socket and the other end to the IO box.
-
Connect one end of the Ethernet cable to the IO box and the other end to the host machine.
Network Configuration
The sensor communicates with a host machine via DHCP, IPv6/IPv4 link-local, or static IP.
On most systems, connect the sensor to your network or directly to a host machine and use the sensor hostname to communicate.
Your Ouster sensor requires a host with a gigabit Ethernet connection and a 24 V supply.
Optionally, time-synchronize the sensor via an external time source or via PTP over the network.

The sensor hostname is os-991234567890.local, where 991234567890 is the sensor serial number, found on a sticker on the top of the sensor.
For OS-specific networking instructions, see the networking-guide in the Appendix.
Commands to set and delete a static IP address are in the http-api section.
Note: A firewall rule may be required to connect to the sensor and receive data.
Open Google Chrome/Microsoft Edge/Firefox. Use the hostname in the format of http://OS-99xxxxxxxxxx.local to open Ouster Dashboard.
Note: Use the serial number printed on your sensor when entering the hostname. Always use
http://, nothttps://; the sensor web interface does not support HTTPS.
Sensor Web Interface
Access the sensor homepage by entering the sensor’s address (IPv4, IPv6, or hostname) in a browser. For example, use http://os-991234567890.local/, where 991234567890 is the sensor serial number. From here, view sensor information, access documentation, and configure settings.
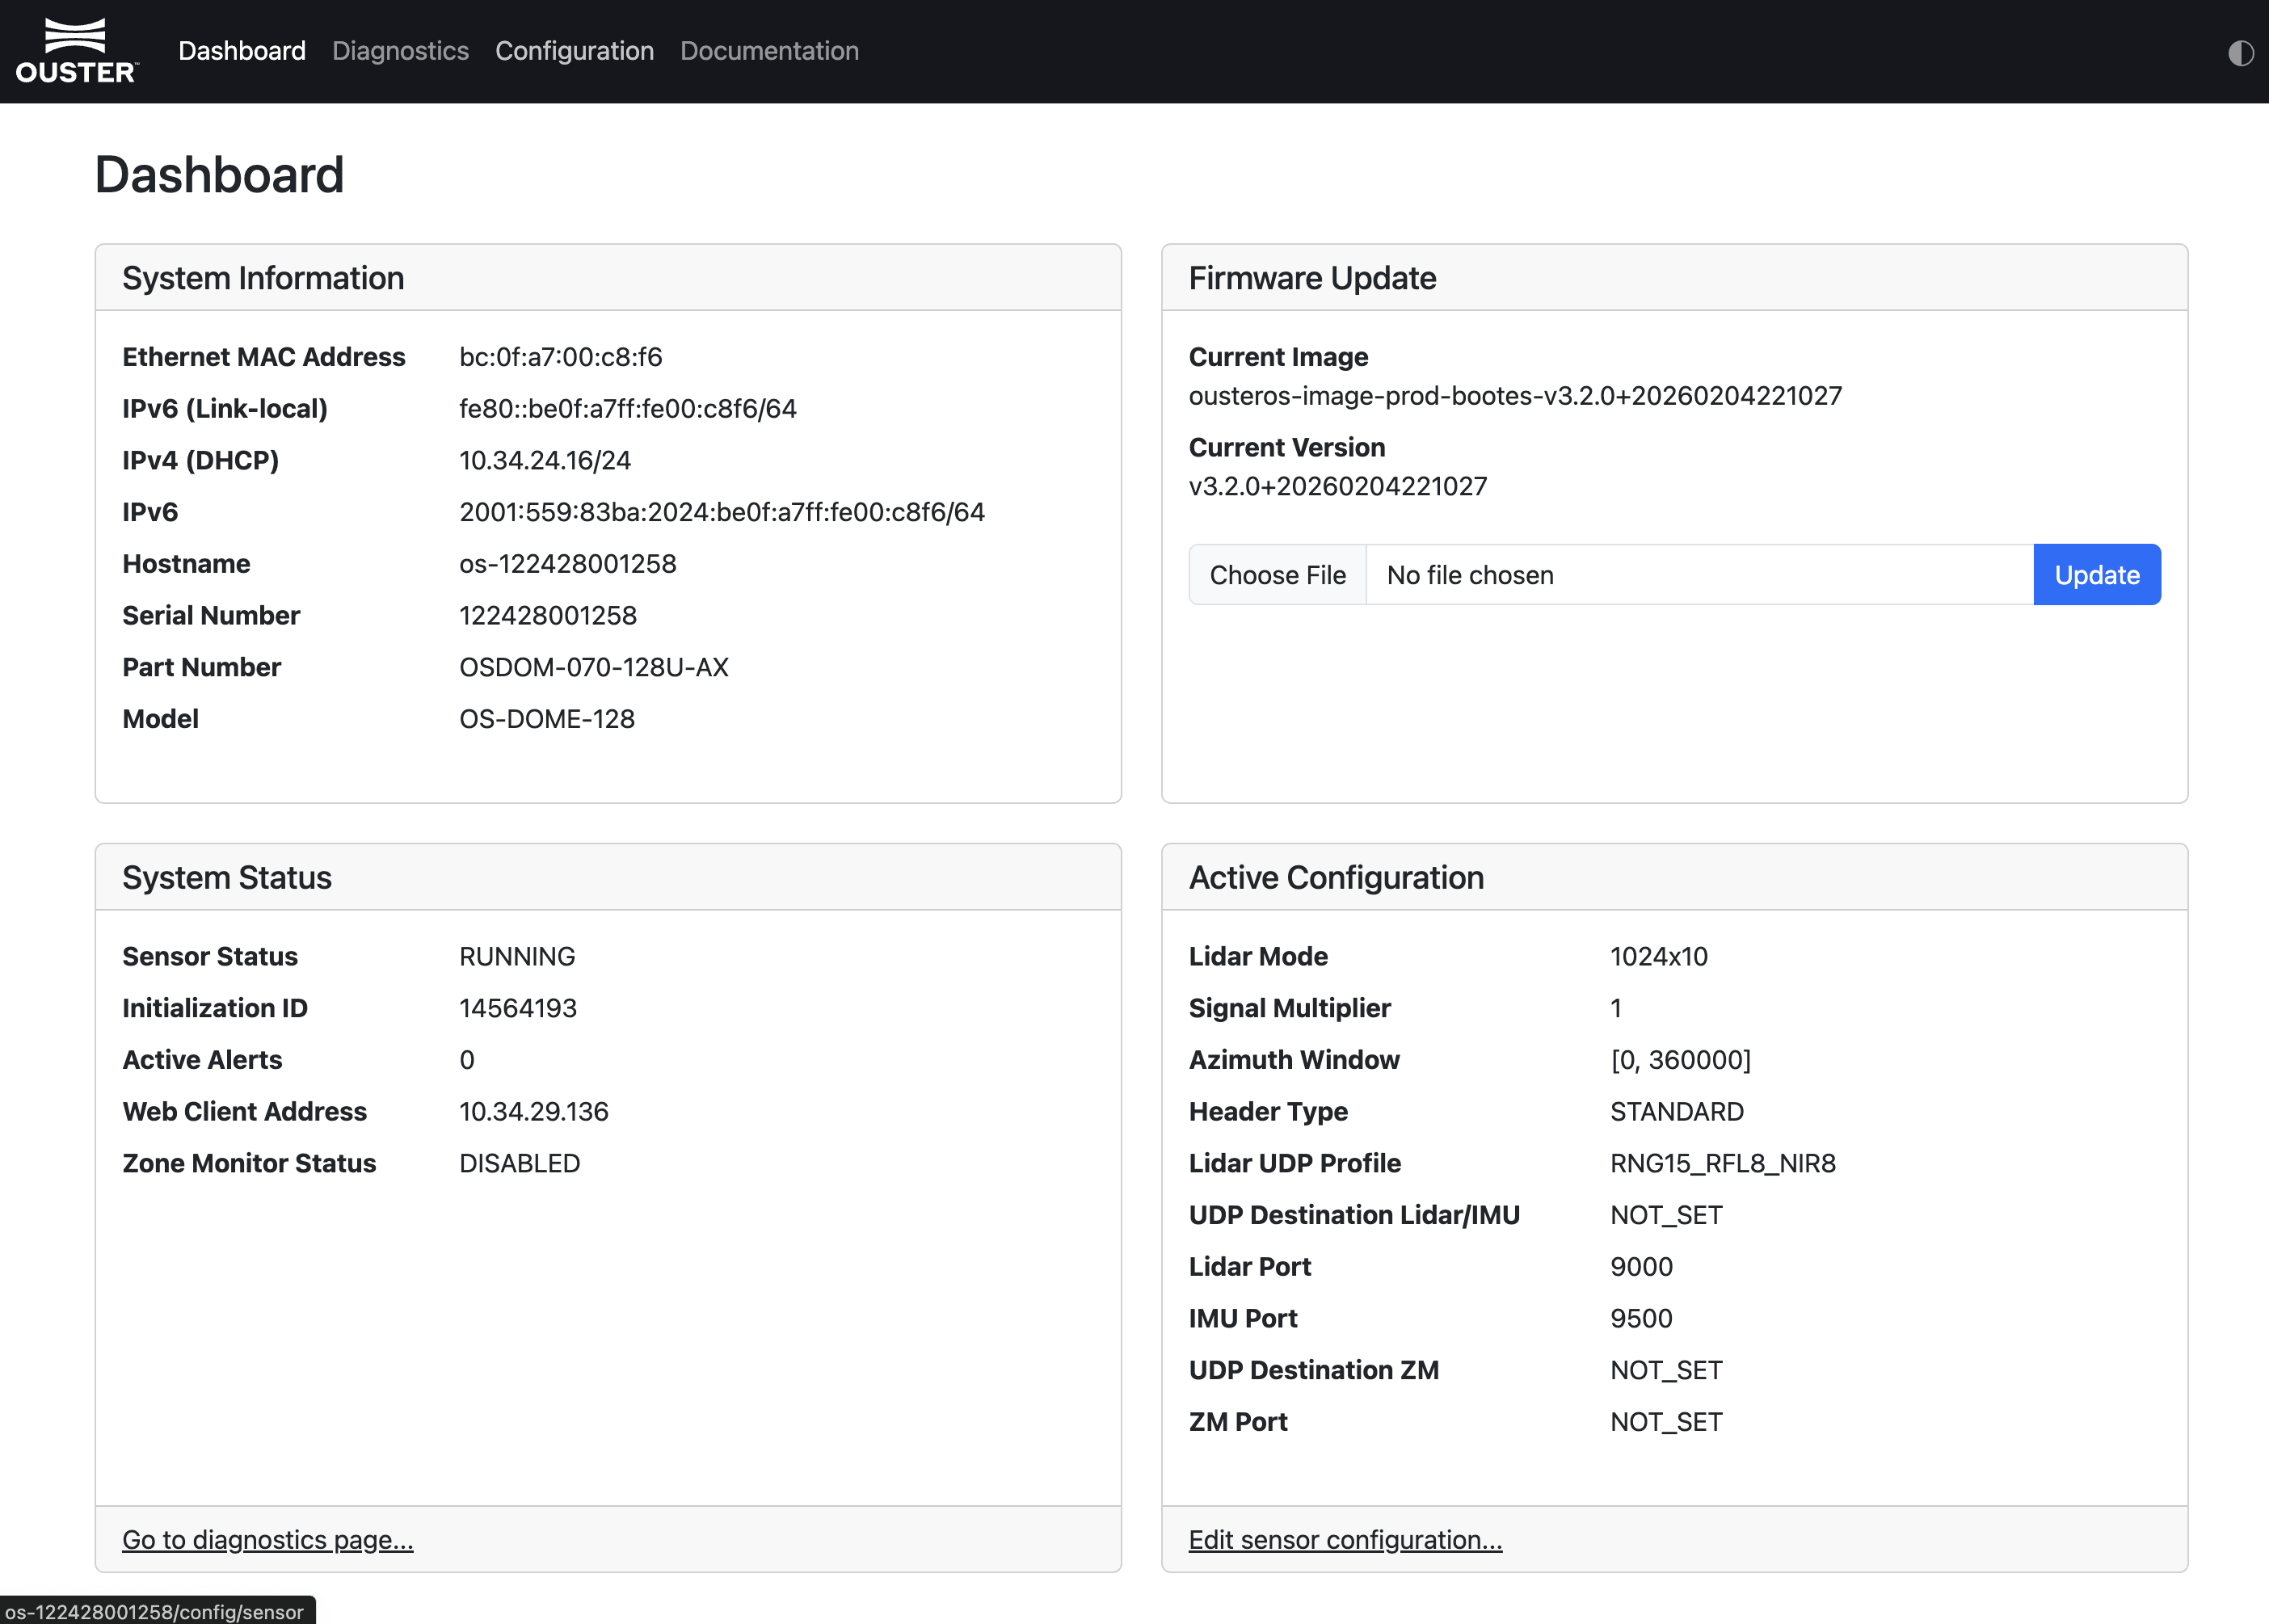
Dashboard: View sensor summary, firmware update controls, current status, and shortcuts to Diagnostics and Configuration.
- System Information: Network configuration and hardware details unique to each sensor.
- Firmware Update: Update sensor firmware from this panel. See update-firmware for details.
- System Status: Current sensor status and any active alerts. Click the link to open the Diagnostics tab.
- Configuration: Current sensor configuration. Click the link to open the Configuration tab and edit settings.
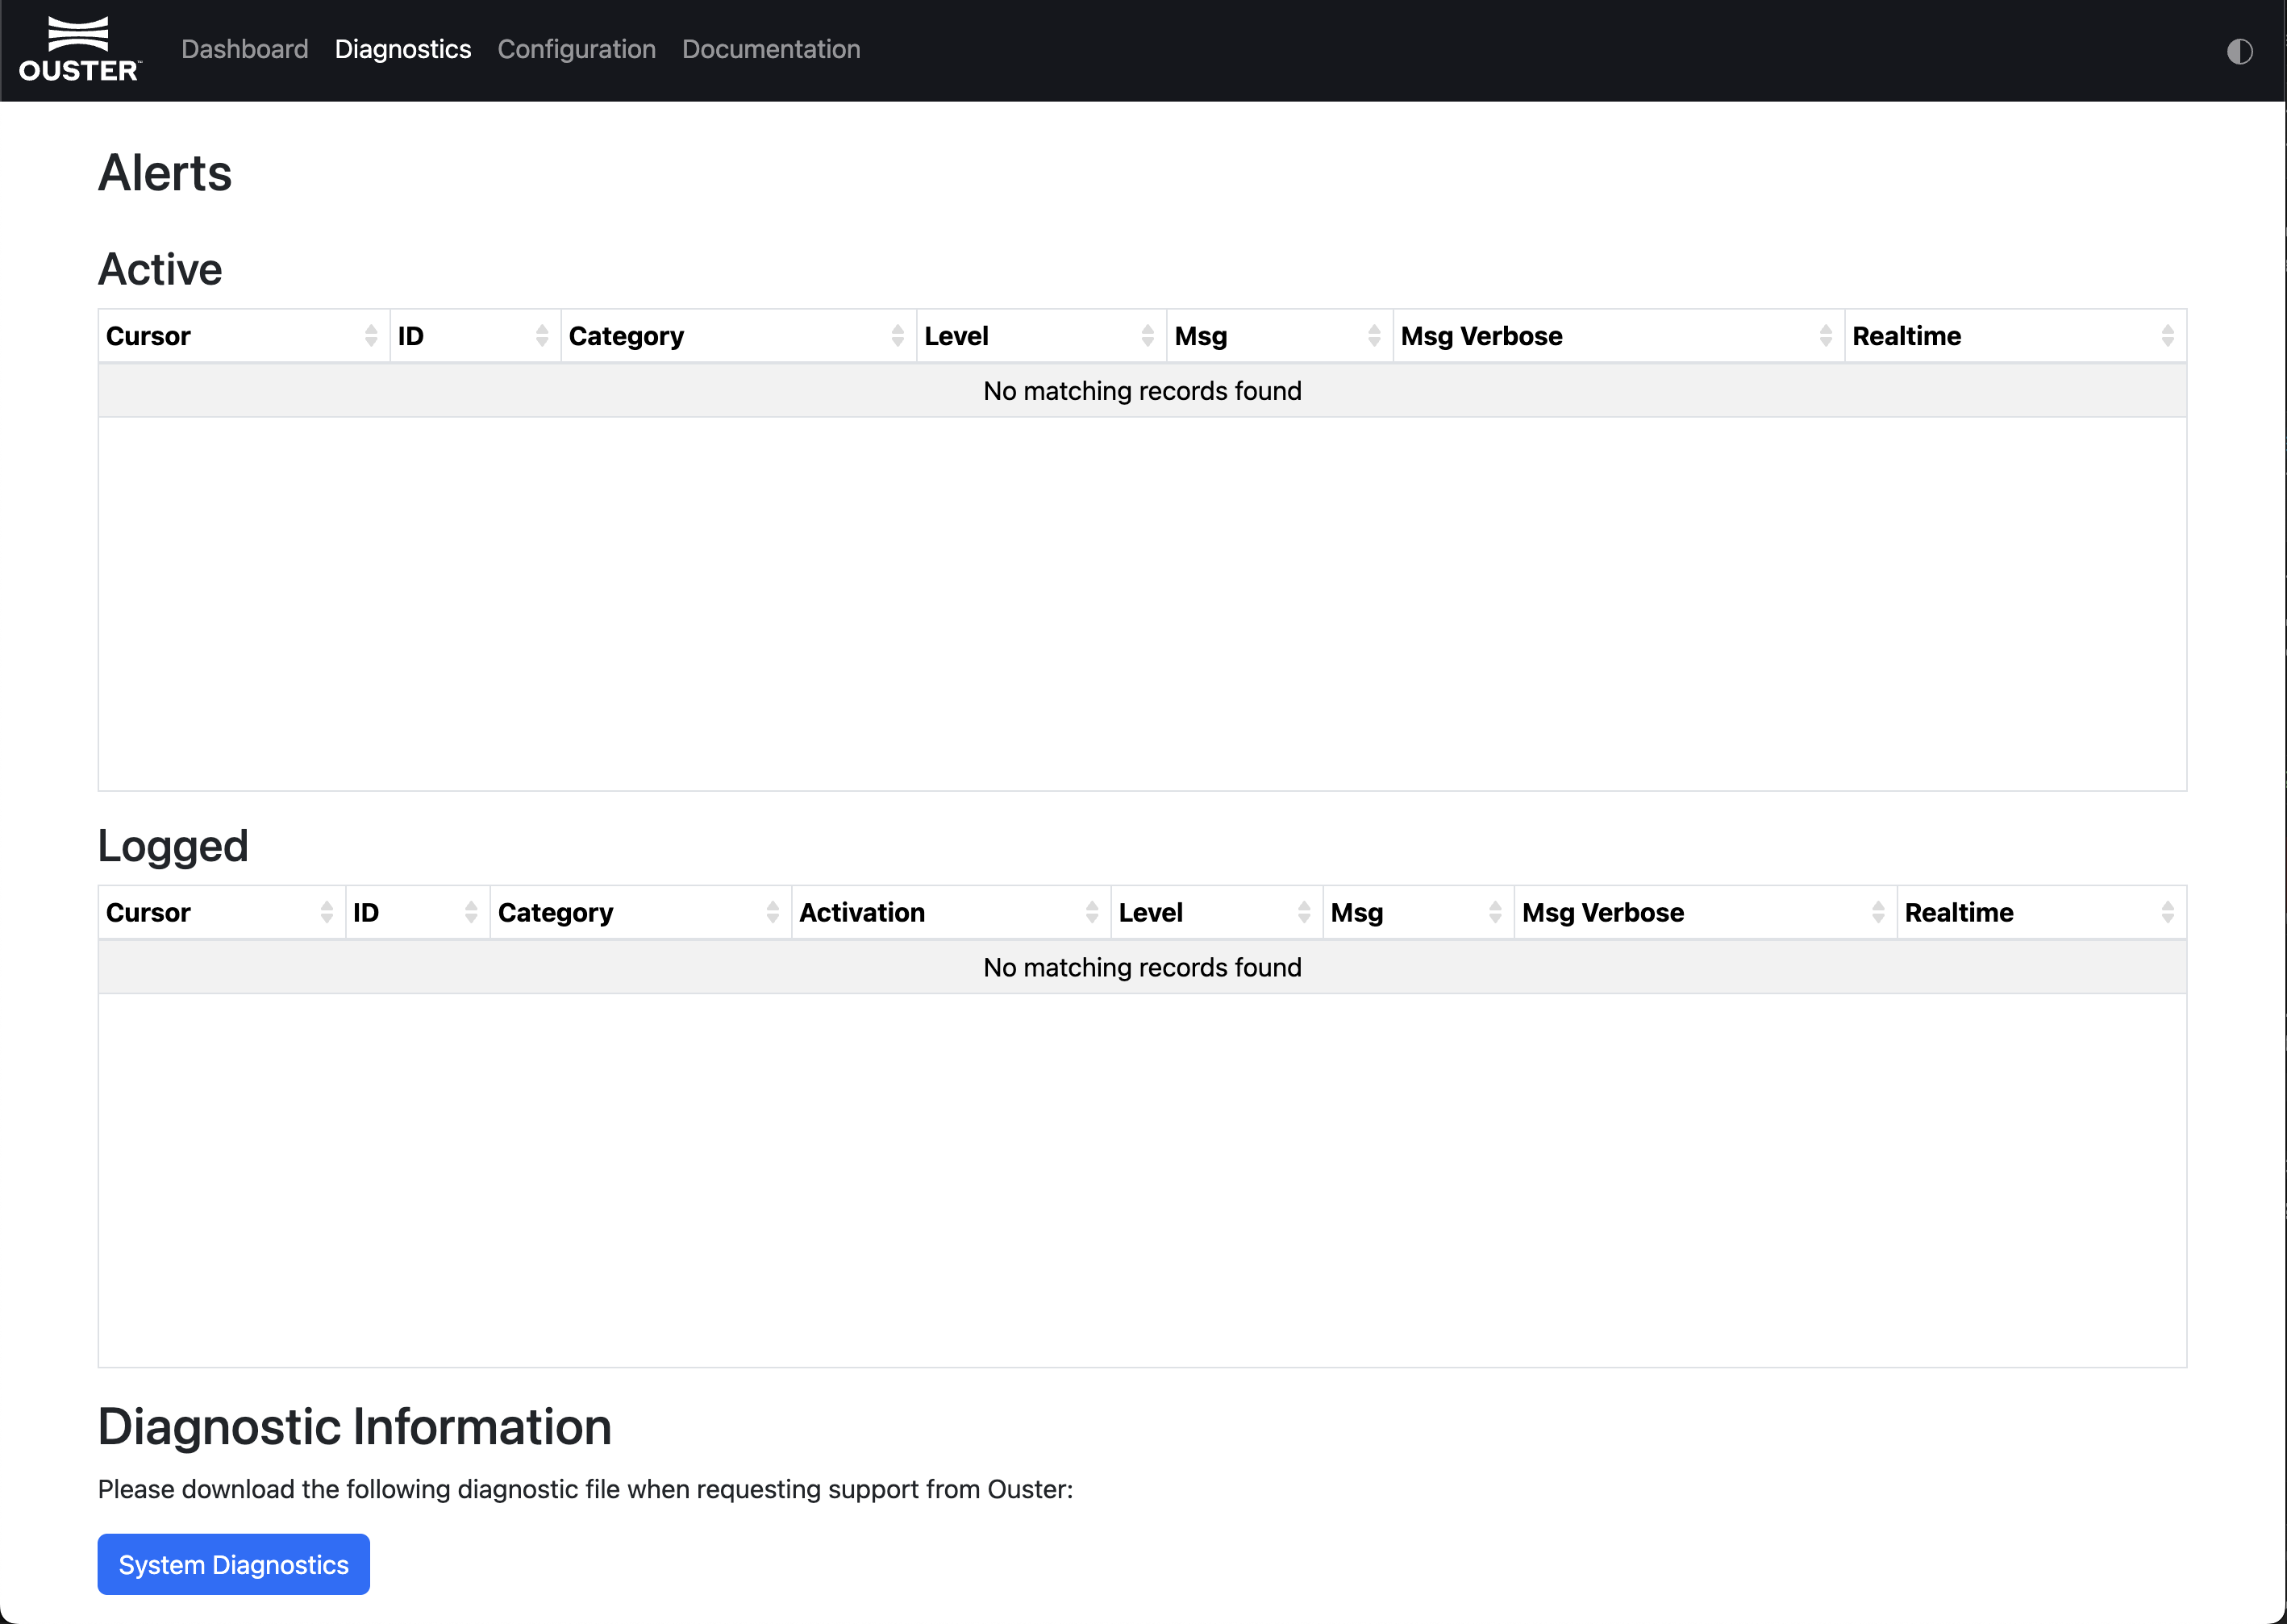
Diagnostics: View active alerts, error details, and downloadable diagnostics information. For a full list of alerts and errors, see Alerts and Errors.
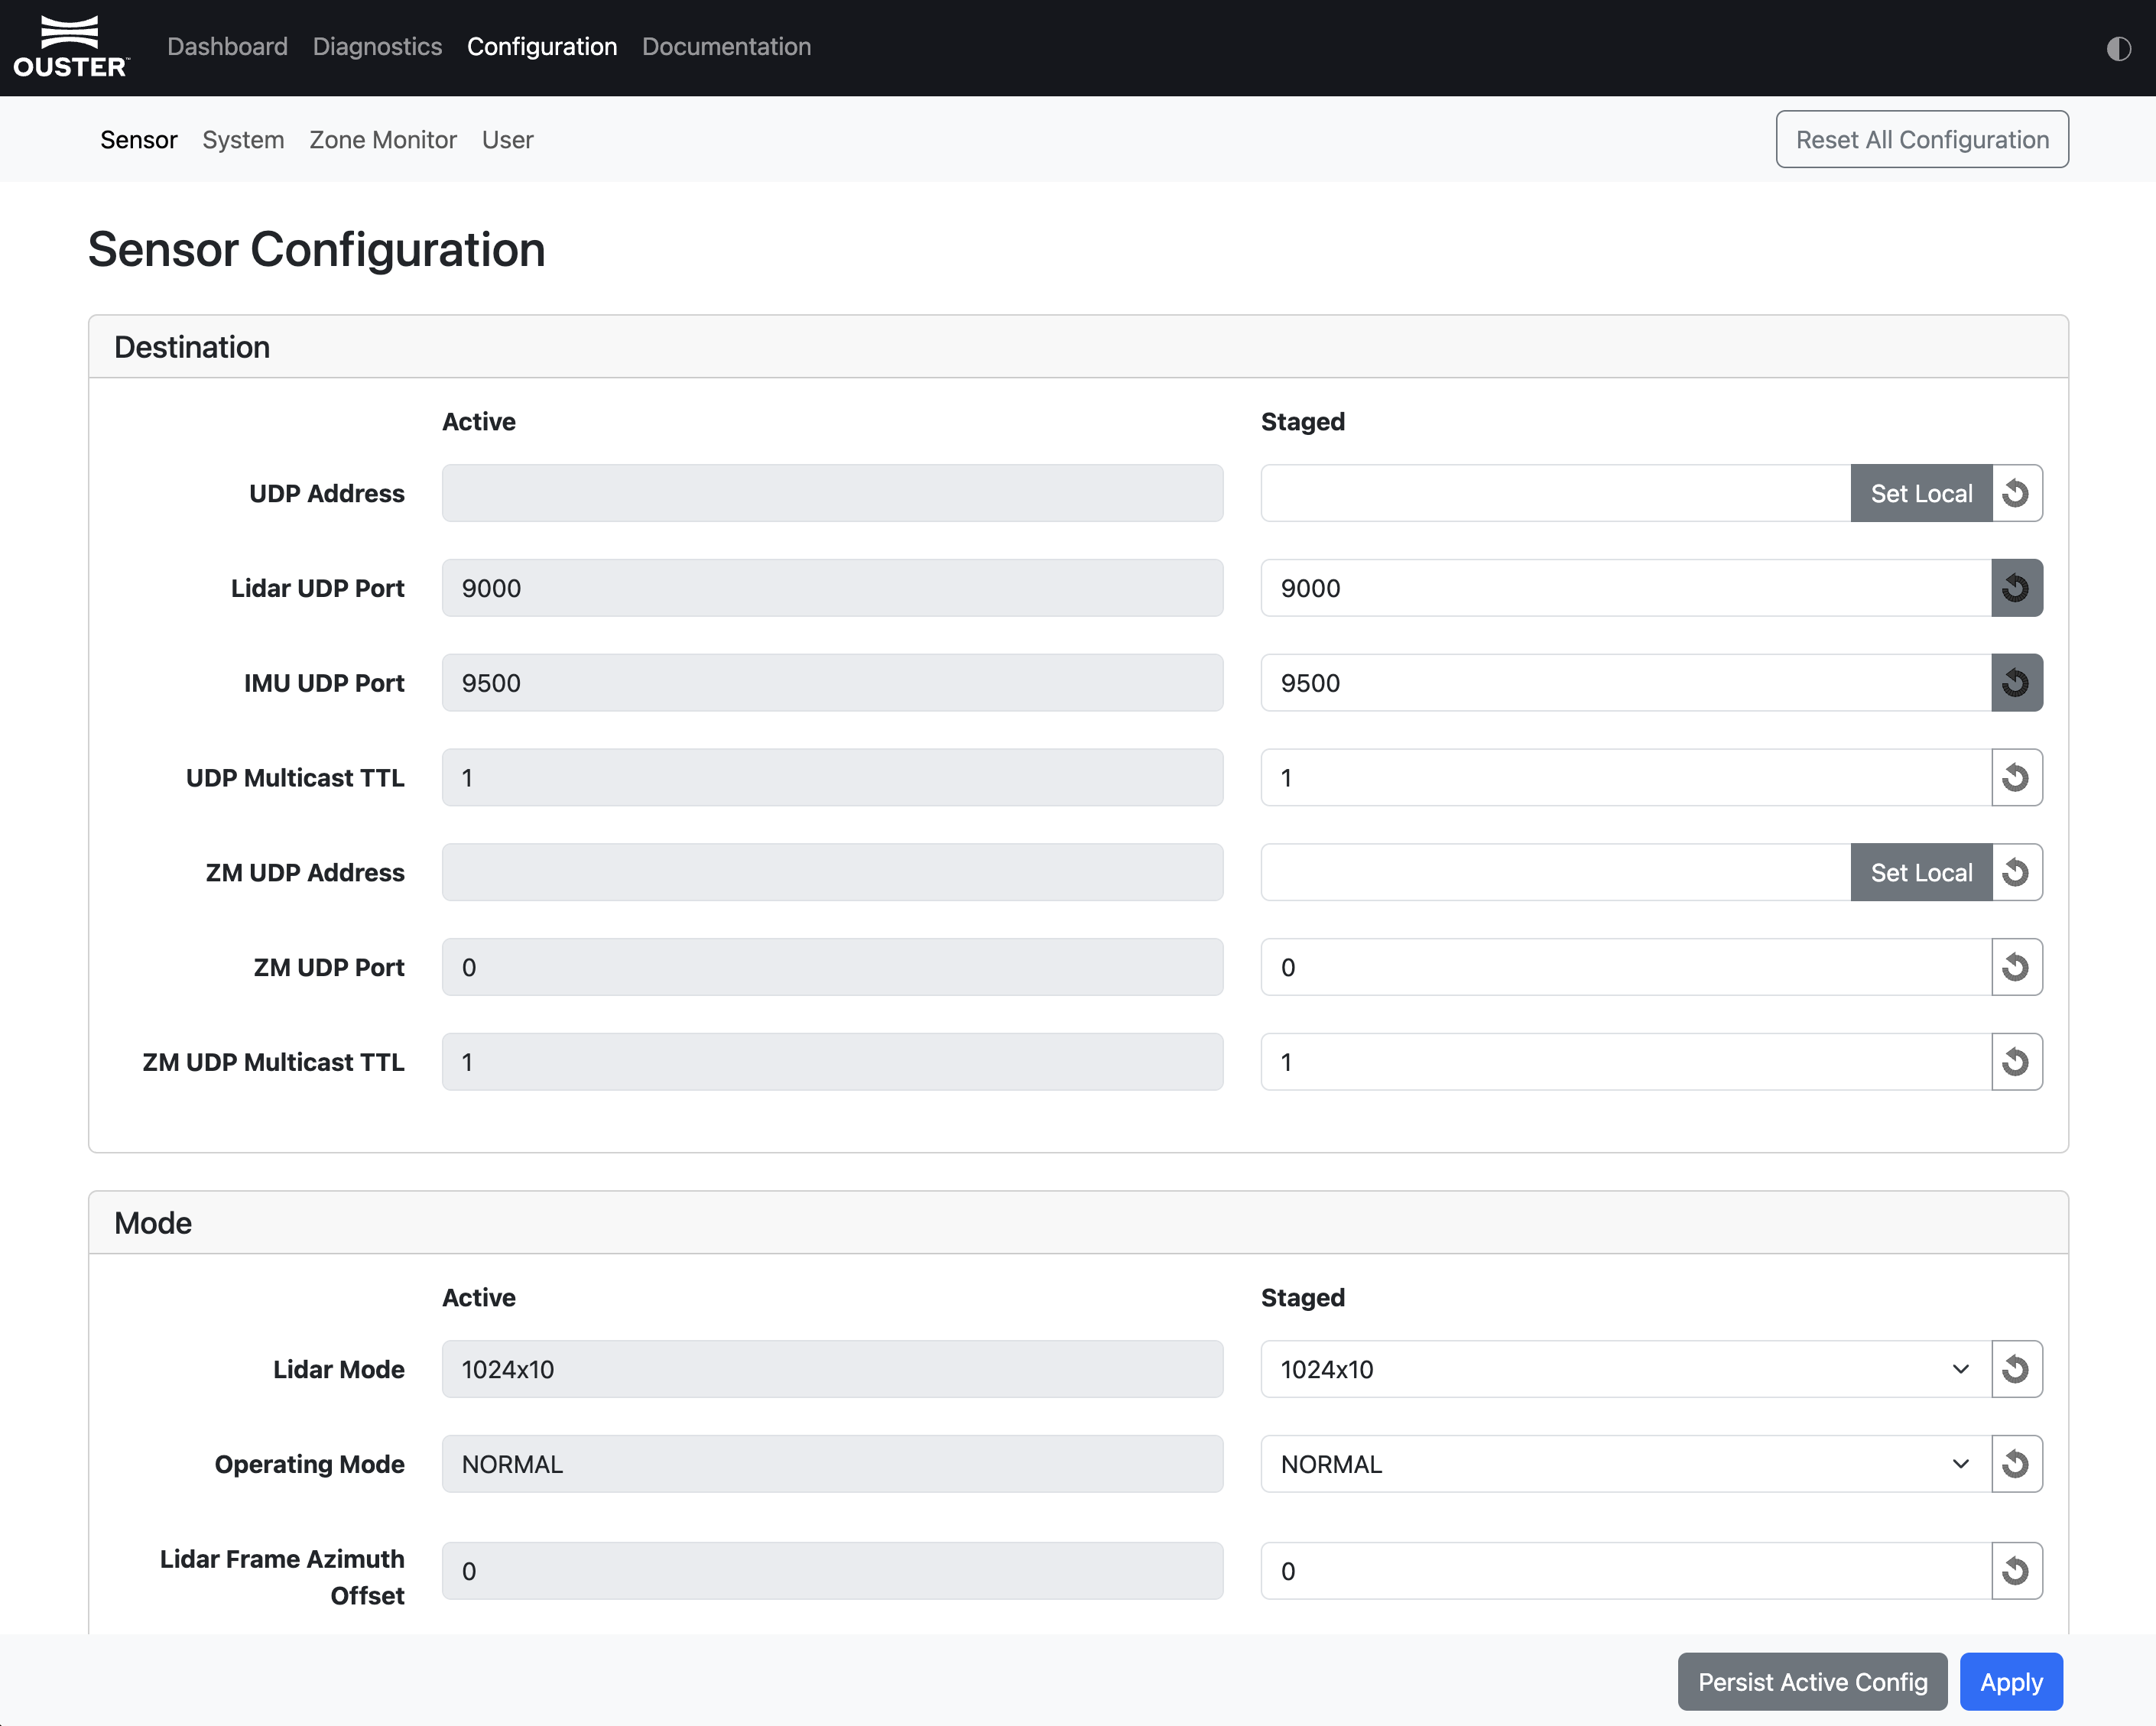
Configuration: View and edit sensor configuration. Configuration changes do not take effect while the sensor is in STANDBY mode; switch to NORMAL mode before applying changes.
- Reset Configuration: Resets the sensor to factory settings. This also clears any configured static IP address.
- Persist Active Config: Writes the current configuration to persistent storage so it reloads on every startup.
- Apply Config (reinit): Applies pending configuration changes by reinitializing the sensor.
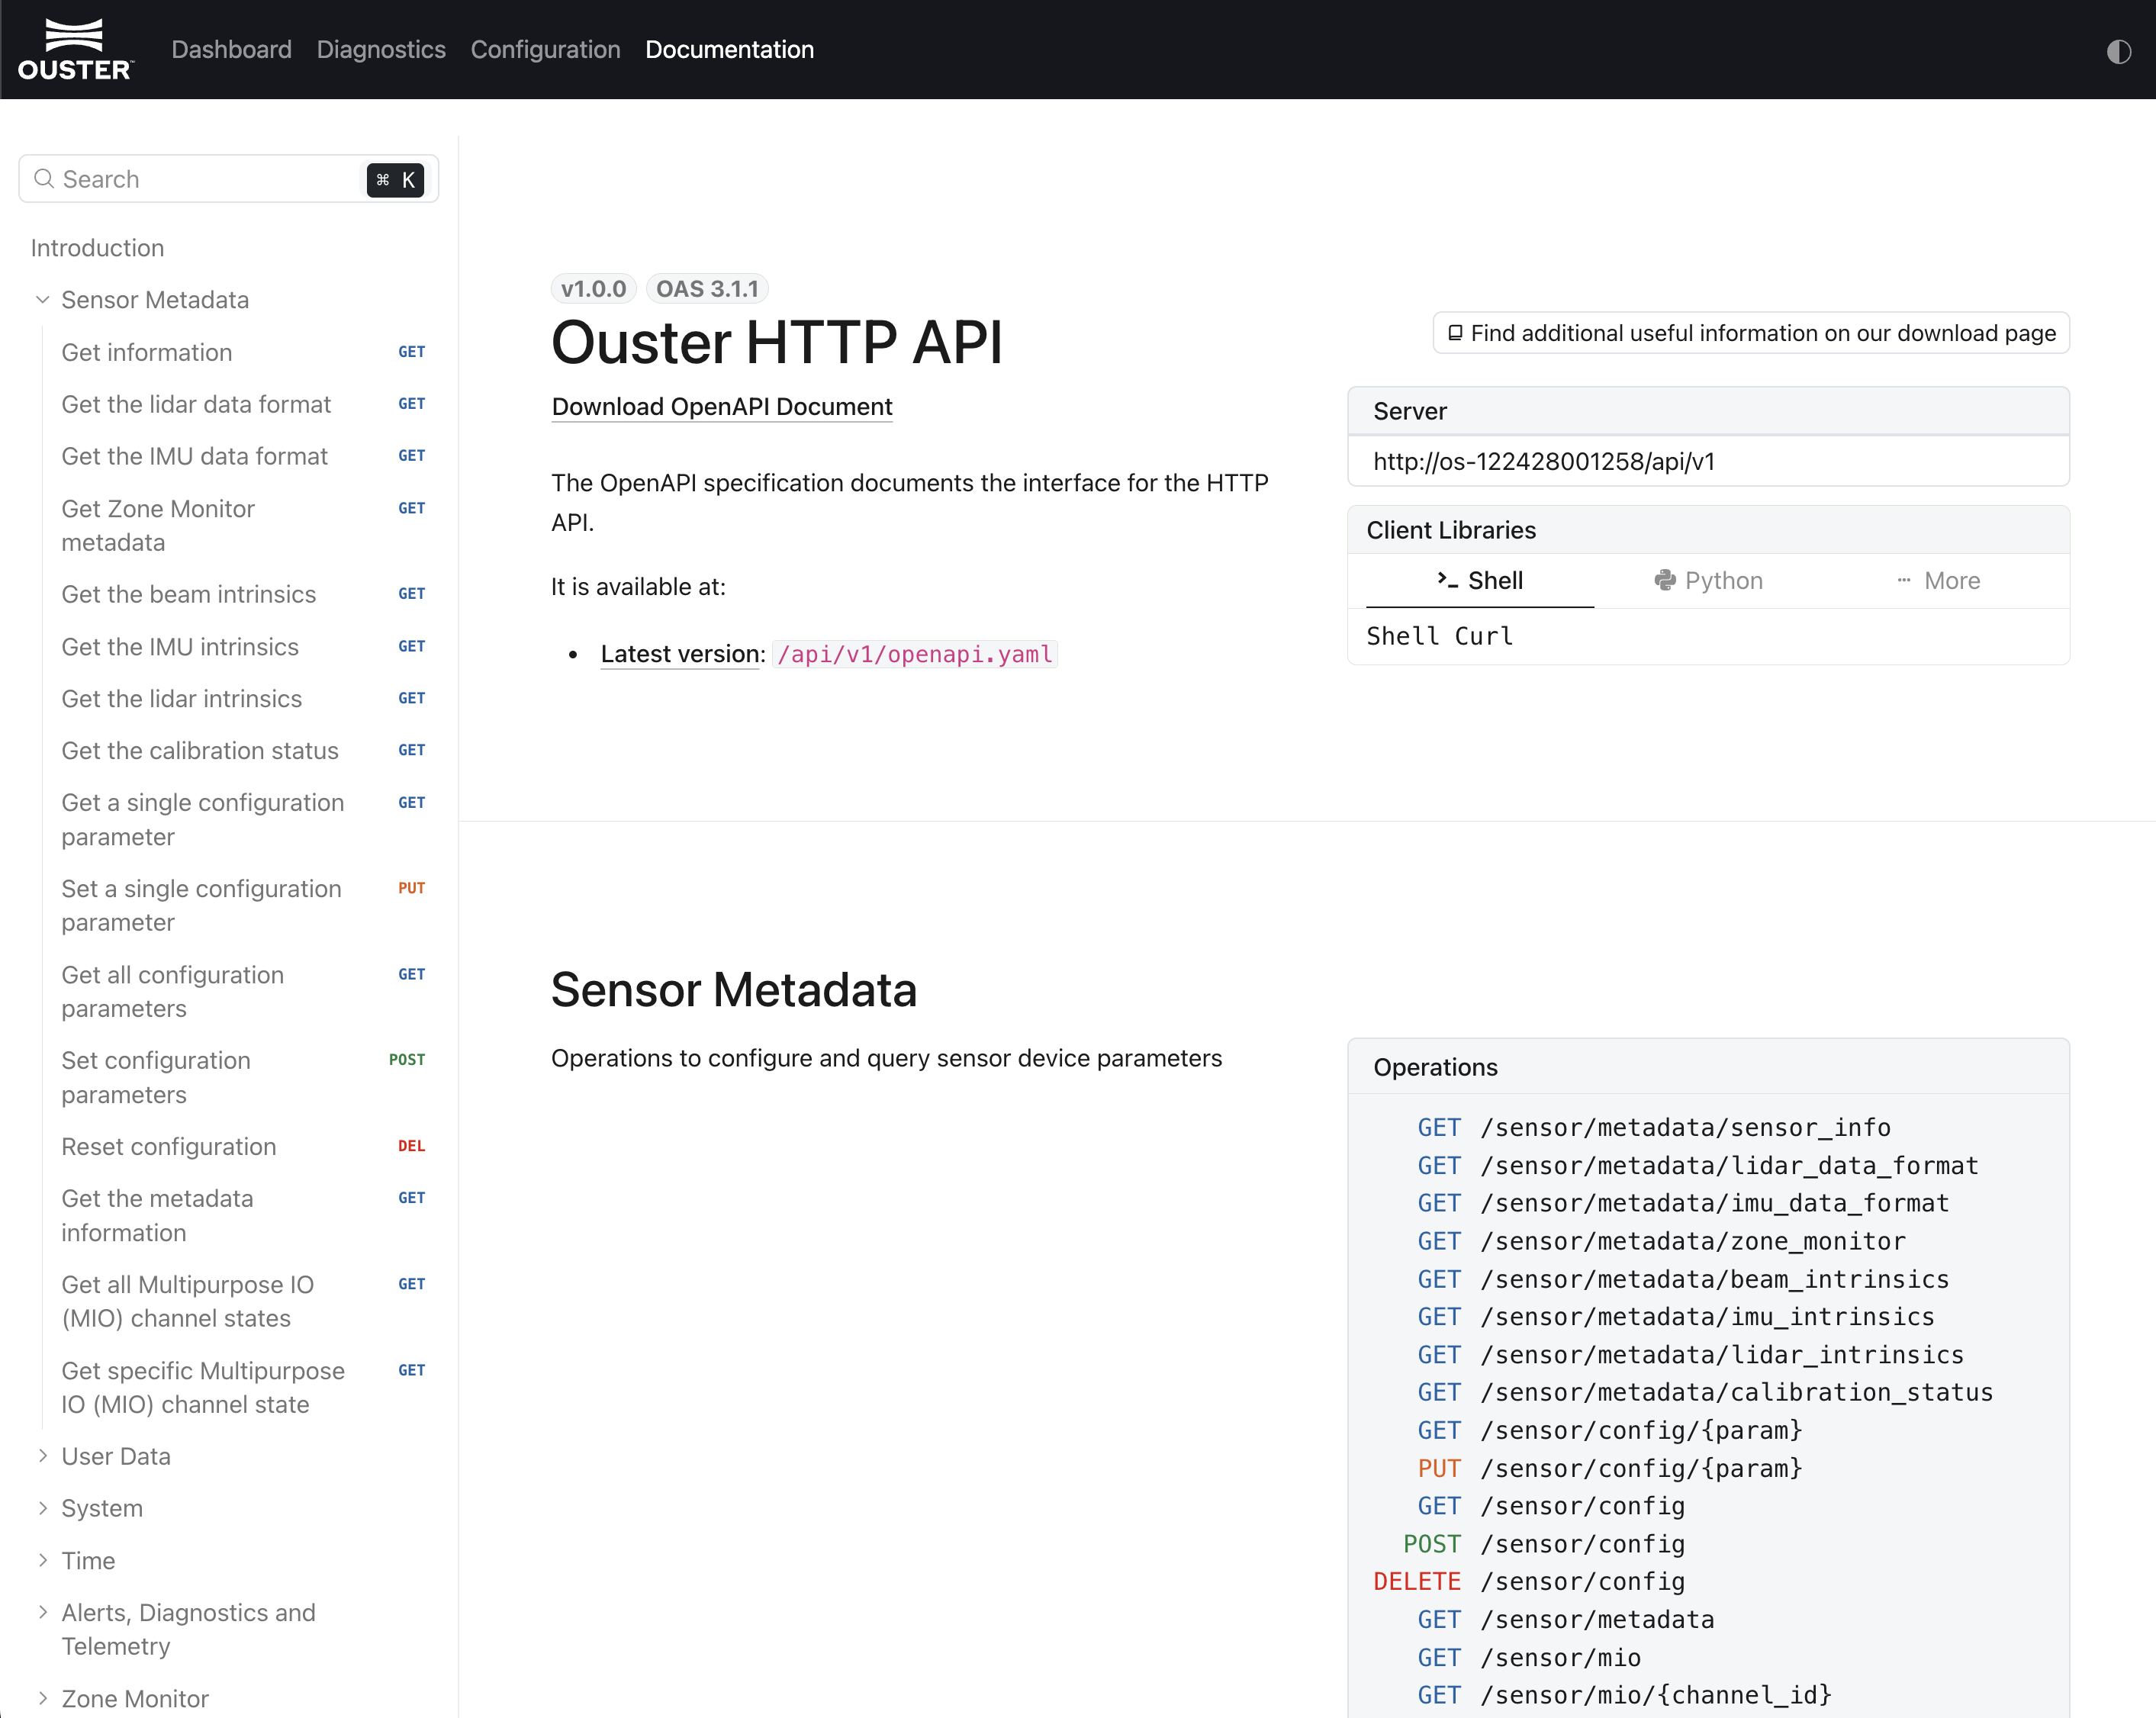
Documentation: View on-sensor OpenAPI documentation for the current firmware version.
Updating Firmware
Download a firmware file from Ouster Downloads, navigate to the sensor web UI (for example, http://os-991234567890.local/), and upload the file when prompted.
Note: Firmware can also be updated via an HTTP endpoint. See update-sensor-firmware in the HTTP API section.
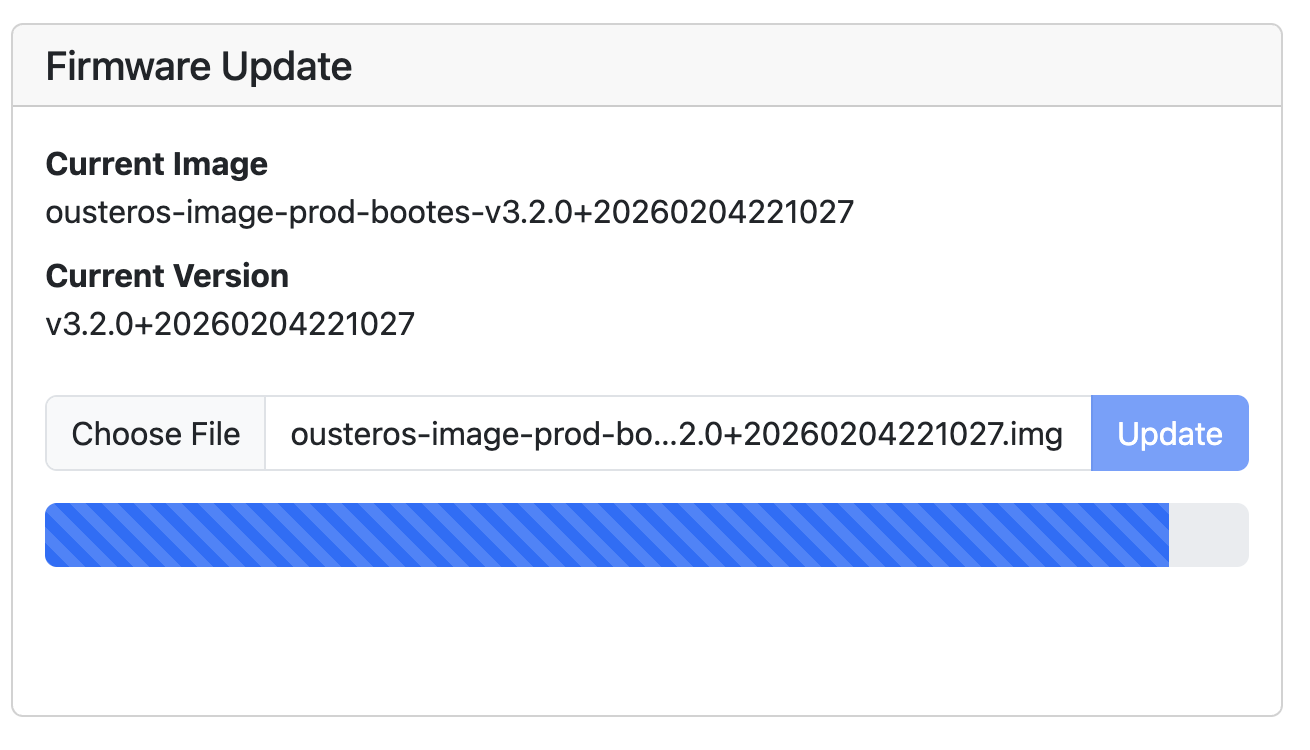
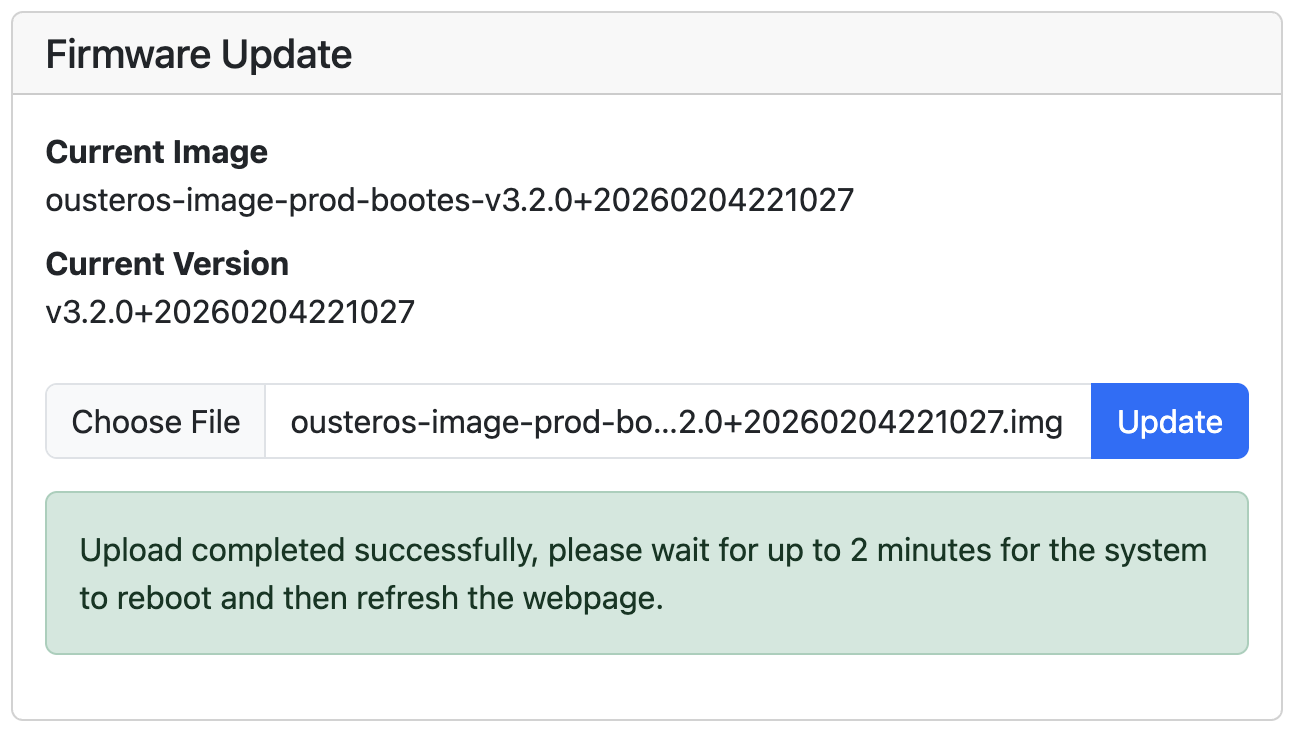
Check the current firmware version before updating. Only update to an equal or higher version number.
After the web UI confirms the update, allow ~2 minutes for the sensor to reboot, then refresh the page to access the updated web UI.